[Heroku](https://devcenter.heroku.com/) is an app hosting platform that supports multiple programming languages, including [[Python]]. First you'll need to develop a user interface for your app with a package like [[streamlit]], [[dash]], [[django]] or [[flask]]. Anything that renders your application in [[HTML]] will suffice.
Heroku loads all of the software (i.e., Python, the packages you need, and your scripts) into a container on its servers in what they call a 'dyno'. That way, your users can run the software without having to load it on their own machine. Heroku is similar to Shiny Apps, if you're used to the R ecosystem.
It's also worth noting that [Heroku does not store data](https://help.heroku.com/K1PPS2WM/why-are-my-file-uploads-missing-deleted) for you. In other words, you won't be able to access the `.csv` files or `.png` files you may have been accessing locally. You'll need to find a cloud-based hosting service like Google Drive or [Amazon S3](https://devcenter.heroku.com/articles/s3-upload-python) for those assets or pay for Heroku's [Managed Data Services](https://www.heroku.com/managed-data-services).
As of 2022, Heroku no longer offers a free tier. The lowest [pricing tier](https://www.heroku.com/pricing) is "Eco" which costs $5 per month for unlimited apps (with up to 1,000 dyno hours per month). These dynos will sleep when not in use, so users may have to wait about 30 seconds for the app to wake up when they visit the URL.
For apps you want to share with others, opt for the "Basic" tier which charges $0.01 per hour up to $7 per month for a single app.
Follow one of the [Heroku Quick Start guides](https://devcenter.heroku.com/) to get started using the software of your choice.
## Install Heroku CLI
Apps are created, deployed and updated on Heroku using the Heroku CLI.
You'll first need to create a verified Heroku account and have [[git]] installed and set up.
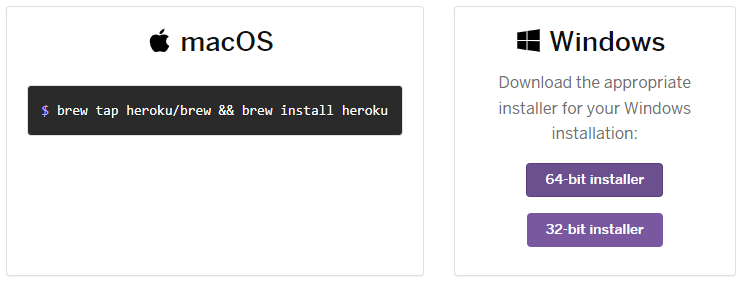
Install the [Heroku CLI](https://devcenter.heroku.com/articles/heroku-cli).
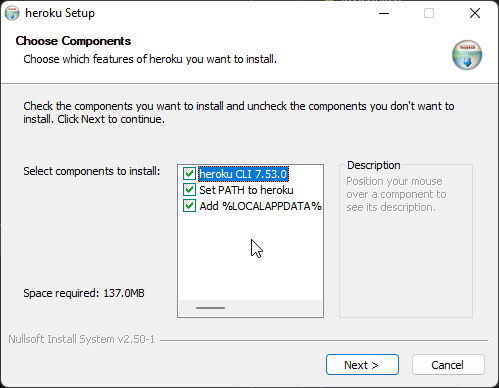
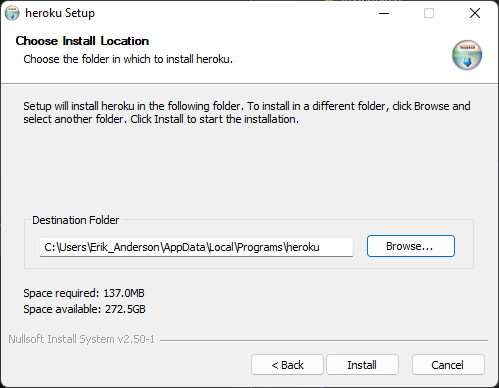
>[!NOTE]- Installation Screens
> 
>
> 
>
> 
## Login to Heroku CLI
To login to Heroku, run the following command in [[Bash]] (or the [[shell]] of your choice).
``` bash
heroku login
```
A browser window will open and prompt for your login details. You'll be prompted to login before deploying and updating your app.
If you have cloned the repository (or you, say, deployed it last time from a different computer), you'll need to establish the remote connection with Heroku first. Type `heroku login` to login (a browser window will open) and then `heroku git:remote -a <app-name>` to connect to the app. You can find the Heroku project name under the Deploy tab. Note you don't want to `clone` the repo as their instructions suggest, simply add the remote.
## Required files
Heroku requires specific files to load your app, including
- [[Procfile]]
- [[requirements.txt]]
Optionally, you can specify the Python version using a `runtime.txt` file with one of the approved Python version specified on a single line, for example `python-3.11.4`.
The contents of each of these files will vary based on the specifics of you app.
## Create a Heroku app
To create an app, run the command
```bash
heroku create <app_name>
```
where `<app name>` will serve as the base of the URL and the name of the app on Heroku's dashboard.
## Deploy to Heroku
Heroku uses [[git]] to deploy apps from the Heroku CLI. Before deploying, always commit your changes and push changes to GitHub (if using). From the root directory, run the following commands in [[Bash]] (or the [[shell]] of your choice.)
```bash
git add -A
git commit -m "<commit message>"
git push origin main # if using GitHub
git push heroku main
```
Use this same process to deploy changes to your app.
## Spin up app
Ensure that at least one instance of the app is running:
```bash
heroku ps:scale web=1
```
> [!note]
> If you see the error `Couldn't find that process type (web)` when running the `ps:scale`, it means your app is still deploying. Wait a few minutes and try again.
## Open the app
The app can be found at the URL shown in the deploy output. You can also open the website with
```bash
heroku open
```
## View logs
View the logs to debug or check the status of your app.
```bash
heroku logs --tail
```
## Turn off your application
To turn off your application, you can scale down the number of dynos to 0.
```bash
heroku ps:scale web=0
```
To turn it back on use
```bash
heroku ps:scale web=1
```
## Update Heroku CLI
Conveniently, the Heroku CLI updates itself everytime you run a `heroku` command, so you'll never need to update it.
## Deploy from test to production
You may want to set up a test app for user testing and other needs before pushing your new app out. Simply set up a heroku app like you would (I append -test to the end to make it clear it's a test environment).
To deploy from the test to production, rename the remote
```
heroku git:remote -a <app name>
# like heroku git:remote -a ei-utilization
```
Then, simply push code to master using --force to overwrite the existing repo
```
git push heroku master --force
```
You should now see that your production app reflects the new app.
For the Utilization Report, I needed a fully new directory to start the second version since I was changing to Dash/Plotly from Streamlit/Matplotlib. I created a new directory, built the app, deployed to a test heroku app, conducted user testing, then renamed the remote and pushed to production. I maintained the test environment so I could switch back to it if I wanted to do more user testing of new features.
## Tracking with Google Analytics
To track with Google Analytics, set up a new web property on Google Analytics, get the script, and paste it into the header tag in `index.py`.
```python
app.index_string = '''
<!DOCTYPE html>
<html>
<head>
{%metas%}
<title>Utilization Report</title>
{%favicon%}
{%css%}
<!-- Global site tag (gtag.js) - Google Analytics -->
<script async src="https://www.googletagmanager.com/gtag/js?id=UA-151885346-2"></script>
<script>
window.dataLayer = window.dataLayer || [];
function gtag(){dataLayer.push(arguments);}
gtag('js', new Date());
gtag('config', 'UA-151885346-2');
</script>
</head>
<body>
<div></div>
{%app_entry%}
<footer>
{%config%}
{%scripts%}
{%renderer%}
</footer>
<div></div>
</body>
</html>
'''
```
Optionally, you can store the tracking code as an environment variable as below, and use an f-string to sub in the environment variable for the hard-coded value. Because the property id is served as plain text online anyway, I'm not sure it's worth it.
To track with google analytics, set up a new web property on Google Analytics, get the code (e.g., `UA-999999-99) and simply use the command:
```
heroku config:add GOOGLE_ANALYTICS_SITE_ID=UA-999999-99
```
> [!tip]- Additional Resources
> - Try the [[Deploy a Streamlit App on Heroku tutorial]]